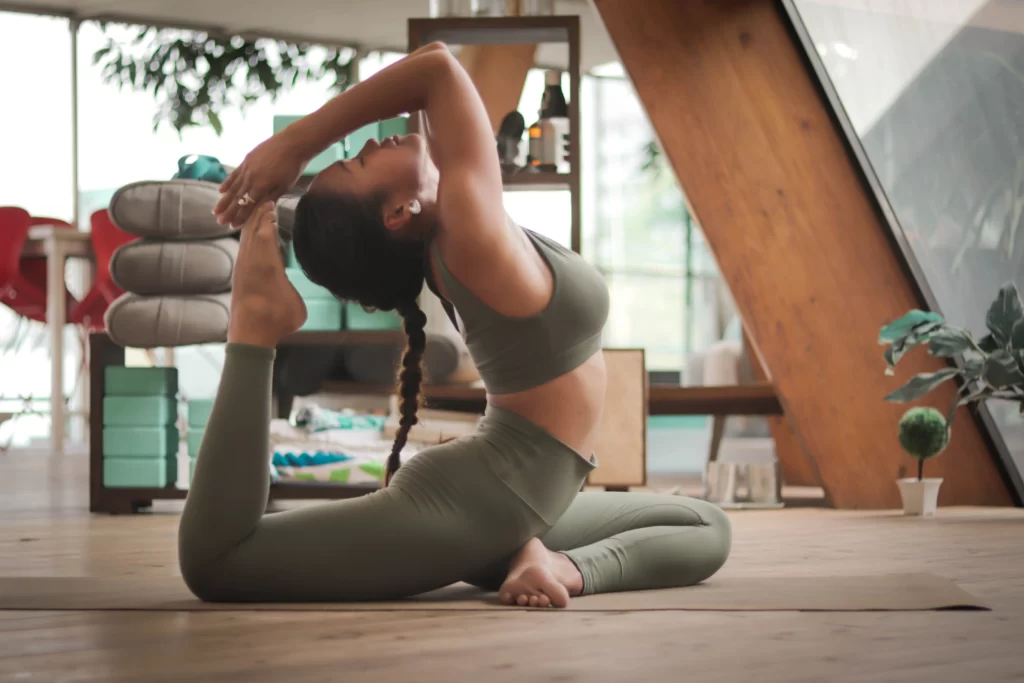
Welcome to the ultimate guide for mastering the 10 most essential yoga poses for beginners! Whether you’re new to yoga or looking to refine your practice, this comprehensive guide will provide step-by-step instructions and tips to help you perfect each pose.

Yoga is not just a physical exercise but a holistic practice that combines movement, breath control, and meditation. By incorporating these 10 foundational poses into your routine, you’ll not only build strength and flexibility but also cultivate a deep sense of calm and clarity.
In this guide, we’ll cover each pose in detail, breaking down the correct alignment, modifications for different skill levels, and the physical and mental benefits they offer. From the downward dog, tree pose, to the mountain pose, each pose serves a specific purpose in strengthening your body and calming your mind.
Also Read: 10 Advantages of Yoga Across All Age Groups
Whether you’re practicing yoga at home or in a studio, this guide will give you the tools and knowledge to confidently flow through these essential poses. So roll out your mat, take a deep breath, and let’s get started on your journey to mastering these 10 essential yoga poses for beginners!
Importance of Mastering Yoga Pose
Before diving into the specific poses, it’s important to understand why mastering the basics is crucial in yoga. Just like building a strong foundation for a house, mastering the fundamental poses sets the groundwork for a safe and effective yoga practice. It helps you develop body awareness, proper alignment, and a deep understanding of your body’s capabilities.
By mastering the basics, you’ll also be able to progress to more advanced poses with confidence, as they often build upon the foundations you establish in the beginning. So, let’s begin with the first pose: the Mountain Pose.
Mountain Pose (Tadasana)
The Mountain Pose, also known as Tadasana, is the starting point for many standing poses in yoga. It may seem simple, but it’s a powerful pose that helps improve posture, balance, and core strength. To practice the Mountain Pose, follow these steps:
- Stand tall with your feet hip-width apart and your arms relaxed by your sides.
- Distribute your weight evenly on both feet, grounding down through all four corners of each foot.
- Engage your thigh muscles, lift your kneecaps, and lengthen your tailbone towards the floor.
- Roll your shoulders back and down, opening your chest and extending your spine.
- Relax your face, jaw, and neck, and gaze softly ahead.

Remember to breathe deeply throughout the pose, inhaling and exhaling slowly and steadily. Hold the Mountain Pose for 5-10 breaths, gradually increasing the duration as you become more comfortable.
Downward Facing Dog (Adho Mukha Svanasana)
The Downward Facing Dog, or Adho Mukha Svanasana, is a rejuvenating pose that stretches and strengthens the entire body. It’s often used as a transition pose or a resting pose in between more challenging sequences. To practice the Downward Facing Dog, follow these steps:
- Start on your hands and knees, with your hands slightly in front of your shoulders and your knees directly below your hips.
- Spread your fingers wide, pressing into the palms of your hands, and tuck your toes under.
- On an exhale, lift your knees off the mat, straightening your legs as much as possible without locking your knees.
- Press your hips up and back, lengthening your spine and creating an inverted V shape with your body.
- Engage your core, draw your shoulder blades down your back, and relax your neck.
If you’re a beginner, you can bend your knees slightly or take a wider stance to make the pose more accessible. Hold the Downward Facing Dog for 5-10 breaths, focusing on grounding through your hands and heels while lengthening your spine.
Warrior I (Virabhadrasana I)
The Warrior I pose, or Virabhadrasana I, is a powerful standing pose that strengthens your legs, opens your hips, and improves balance. It’s named after the fierce warrior Virabhadra from Hindu mythology. To practice the Warrior I pose, follow these steps:
- Begin in the Mountain Pose.
- Step your left foot back about 3-4 feet, keeping your feet hip-width apart.
- Rotate your left foot outwards at a 45-degree angle and align your left heel with your right heel.
- Bend your right knee, keeping it directly above your ankle, and square your hips towards the front of the mat.
- Extend your arms overhead, reaching towards the sky, with your palms facing each other or touching.
- Keep your gaze forward or lift it slightly towards your hands.
If you have tight hips or balance issues, you can modify the pose by taking a wider stance or keeping your hands on your hips. Hold the Warrior I pose for 5-10 breaths, gradually increasing the duration as you build strength and flexibility.
Warrior II (Virabhadrasana II)
The Warrior II pose, or Virabhadrasana II, is a dynamic standing pose that builds strength in the legs, opens the hips, and improves focus and concentration. It’s a natural progression from the Warrior I pose. To practice the Warrior II pose, follow these steps:
- From the Warrior I pose, open your hips by rotating your torso to the side, extending your arms out to the sides.
- Your right foot should still point forward, while your left foot should be parallel to the back edge of the mat.
- Bend your right knee, keeping it directly above your ankle, and extend your arms out in line with your shoulders.
- Gaze over your right fingertips, keeping your neck relaxed and your shoulders away from your ears.
- Engage your core, press into the outer edge of your back foot, and sink deeper into the pose with each exhale.
- If you find it challenging to maintain balance or keep your knee aligned, you can modify the pose by taking a wider stance or using a block under your front hand for support. Hold the Warrior II pose for 5-10 breaths on each side, focusing on the strength and stability of your legs.
If you find it challenging to maintain balance or keep your knee aligned, you can modify the pose by taking a wider stance or using a block under your front hand for support. Hold the Warrior II pose for 5-10 breaths on each side, focusing on the strength and stability of your legs.
Tree Pose (Vrksasana)
The Tree Pose, or Vrksasana, is a balancing pose that strengthens your legs, improves focus, and cultivates a sense of calm and stability. It’s a great pose for beginners to practice balance and concentration. To practice the Tree Pose, follow these steps:
- Begin in the Mountain Pose.
- Shift your weight onto your left foot, grounding down through all four corners.
- Bend your right knee and place the sole of your right foot on the inside of your left thigh, avoiding the knee joint.
- Find your balance, lengthen your spine, and engage your core to help stabilize your body.
- Bring your hands together at your heart center, or if you’re feeling more stable, extend your arms overhead.
- Soften your gaze and find a focal point to help steady your concentration.
If you’re struggling with balance, you can modify the pose by placing the sole of your right foot on your left calf or using a wall or chair for support. Hold the Tree Pose for 5-10 breaths on each side, gradually increasing the duration as you improve your balance.
Bridge Pose (Setu Bandha Sarvangasana)
The Bridge Pose, or Setu Bandha Sarvangasana, is a gentle backbend that strengthens the back, opens the chest, and stretches the hips and thighs. It’s a great pose for beginners to counteract the effects of sitting for long periods. To practice the Bridge Pose, follow these steps:
Certainly, here are the steps you provided as bullet points:
- Lie on your back with your knees bent and your feet hip-width apart, close to your buttocks.
- Place your arms alongside your body, palms facing down.
- Press your feet and arms into the mat, inhale, and lift your hips off the floor, rolling up one vertebra at a time.
- Keep your chin slightly tucked to lengthen the back of your neck, and engage your glutes and core.
- If it feels comfortable, you can interlace your fingers under your body and press your arms down for extra support.
If you have neck or back issues, you can modify the pose by using a block under your sacrum or raising your hips only as far as feels comfortable. Hold the Bridge Pose for 5-10 breaths, focusing on opening your chest and lengthening your spine.
Child’s Pose (Balasana)
The Child’s Pose, or Balasana, is a relaxing pose that stretches the back, shoulders, and hips, and promotes deep relaxation and introspection. It’s often used as a resting pose during a yoga practice. To practice the Child’s Pose, follow these steps:
Certainly, here are the steps you provided as bullet points:
- Begin on your hands and knees, with your knees wider than hip-width apart and your big toes touching.
- Sit back on your heels and slowly lower your torso between your thighs, reaching your arms forward.
- Rest your forehead on the mat, or if it doesn’t reach, you can place a block or a folded blanket under your forehead.
- Allow your entire body to relax, surrendering any tension or stress with each exhale.
- Breathe deeply into your back and feel the gentle stretch along your spine.
If you have tight hips or knee issues, you can modify the pose by placing a bolster or folded blanket under your torso for support. Stay in the Child’s Pose for as long as feels comfortable, taking slow, deep breaths to fully relax your body and mind.
Corpse Pose (Savasana)
The Corpse Pose, or Savasana, is the final resting pose in a yoga practice. It’s a pose of deep relaxation and integration, allowing your body and mind to absorb the benefits of your practice. To practice the Corpse Pose, follow these steps:
- Lie on your back with your legs comfortably apart and your arms by your sides, palms facing up.
- Close your eyes and release any tension in your body, allowing your entire body to soften and relax.
- Let go of any thoughts or distractions, and deeply surrender to the present moment.
- Focus on your breath, allowing it to become natural and effortless, flowing in and out of your body.
- Stay in the Corpse Pose for at least 5-10 minutes, or longer if time allows, gradually coming back to a seated position when you’re ready.
The Corpse Pose is a beautiful opportunity to fully integrate the benefits of your yoga practice and find stillness and peace within.
Tips for mastering the poses
As you work on mastering these 10 essential yoga poses for beginners, here are a few tips to keep in mind:
- Listen to your body: Pay attention to how your body feels in each pose and modify or adjust as needed. Remember that everyone’s body is different, so honor your own limitations and progress at your own pace.
- Breathe deeply: Breathing is an essential part of yoga. Focus on taking slow, deep breaths in and out through your nose, allowing your breath to guide your movements and help you find ease in each pose.
- Practice regularly: Consistency is key in yoga. Aim to practice these poses at least a few times a week to build strength, flexibility, and familiarity. Over time, you’ll notice improvements in your practice and overall well-being.
- Seek guidance if needed: If you’re unsure about proper alignment or modifications, consider attending a beginner’s yoga class or working with a qualified yoga instructor. They can provide personalized guidance and support to help you refine your practice.
Common mistakes to avoid
While practicing these poses, it’s important to be aware of common mistakes that can hinder your progress. Here are a few to watch out for:
- Overarching the lower back: In poses like the Warrior I or Bridge Pose, avoid excessive arching of the lower back. Instead, engage your core and lengthen your tailbone towards the floor to maintain a neutral spine.
- Straining the neck: Keep your neck relaxed and in line with your spine in all poses. Avoid jutting your chin forward or collapsing your neck. Imagine lengthening through the crown of your head to maintain proper alignment.
- Holding your breath: Remember to breathe deeply and continuously throughout your practice. Holding your breath can cause tension and disrupt the flow of energy. Use your breath as a tool to stay present and connected to your body.
- Comparing yourself to others: Yoga is a personal journey, and everyone’s practice looks different. Avoid comparing yourself to others in the class or on social media. Focus on your own progress and listen to your body’s needs.
Resources for further learning
Remember, yoga is a lifelong practice, and there’s always something new to learn and explore. Enjoy the journey and embrace the transformative power of yoga in your life.
- Books: “Light on Yoga” by B.K.S. Iyengar and “The Heart of Yoga: Developing a Personal Practice” by T.K.V. Desikachar are both excellent resources for beginners and experienced practitioners alike.
- Online tutorials: Websites like Yoga Journal, DoYogaWithMe, and Yoga International offer a wide range of free and paid online tutorials for all levels of practitioners.
- Yoga classes and workshops: Consider attending local yoga classes or workshops to learn from experienced instructors and connect with other yoga enthusiasts.
- Yoga apps: There are numerous yoga apps available that offer guided classes, pose breakdowns, and personalized programs. Some popular options include Down Dog, Yoga Studio, and Glo.
Conclusion
Congratulations on completing the ultimate guide for mastering the 10 most essential yoga poses for beginners! By incorporating these foundational poses into your practice, you’ll not only build strength, flexibility, and balance but also cultivate a deep sense of calm and clarity.
Remember to be patient and kind to yourself as you navigate your yoga journey. Each time you step onto your mat, you have the opportunity to deepen your connection with your body, mind, and spirit.
So keep rolling out your mat, taking deep breaths, and embracing the transformative power of yoga. With practice and dedication, you’ll continue to evolve and grow on this beautiful path of self-discovery
FAQ’S
- What are the 10 most essential yoga poses for beginners?
- In this guide, we’ll cover essential yoga poses like Downward Dog, Child’s Pose, Mountain Pose, and more. Each pose offers unique benefits for beginners.
- How can I improve my flexibility and strength as a beginner in yoga?
- Discover how practicing these essential yoga poses can gradually improve your flexibility and strength over time, making your yoga journey more enjoyable.
- Are there modifications for these poses if I’m not very flexible or have physical limitations?
- Learn about modifications and variations for each pose to accommodate different levels of flexibility and address physical limitations, ensuring a safe and comfortable practice.
- What is the proper breathing technique during these yoga poses?
- Breathing is crucial in yoga. We’ll explain the correct breathing techniques to sync with each pose, enhancing relaxation and focus.
- How often should I practice these essential yoga poses to see noticeable progress?
- Find guidance on the recommended frequency and duration of practice to experience meaningful progress in your yoga journey as a beginner.